Modern parents are very familiar with having to raise money for schools, events, and whatever else pops up. Sometimes all we have to do is sell whatever we're asked to sell. Other times, we'll be asked to handle an entire event ourselves. Fundraisers are a great way for your school or organization to build up a nice little stock of funds. People love ice cream. Bring these two things together and you have a recipe for success. If you do it right. Setting up a stand on the side of the road is probably not going to get you a lot of money, and you ice cream will probably melt. However, there are some ways in which to use ice cream to raise a lot of money.
If there’s a local event that you’re aware of, ask the organizers if you can set up an ice cream stand. Some places to inquire are craft fairs, church meals, company picnics, flea markets, and various events held at your local parks. Many places will welcome the refreshment and you’ll be able to raise some money. It never hurts to ask.
You might also want to hold your own event. ‘Ice Cream Festivals’ are popping up all over North America and Europe. The focus is not necessarily the ice cream. Set up games and contests for participants, awarding prizes for winners. You may want to sell tickets to the event, both beforehand and at the door. You can also charge for food, ice cream, and certain games. Make it fun for everyone, and make sure you advertise your event.
In either case, you’ll need to do some planning beforehand. Start by determining how much money you need to raise. The goal is always to raise as much money as possible while spending very little. If you spend too much on your fundraiser, you are less likely to raise the money you need. Settle on your budget early on, and stick to it.
Ask yourself who your target customers are. This will likely be determined by where and when you are hosting your ice cream fundraiser. You’ll want to price your ice cream accordingly. People roaming about a park will probably have less money on hand than those at a swanky party. Consider this when pricing your ice cream. The goal is to sell, after all.
Think about advertising early in the planning stages. If no one knows about your event, no one will come. Put up flyers, run ads in local papers, and submit your event to community or church bulletin boards. Start advertising as soon as you have organized the details of the event so that people can book the date and attend. Otherwise you’ll have a great many people who want to come but can’t.
Determine what types and flavors of ice cream you’ll want to offer then start contacting companies. Many ice cream producers and distributors have fundraising programs, and these are usually your best bet. You could opt to purchase your ice cream from retailers, but you probably won’t get as good a deal. Having to pay the extra money will cut into your profit margin.
You’ll need to rent some equipment for your event. Freezers to keep the ice cream cold, scoops, and bowls and spoons (though most fundraisers use disposables) will all be necessary. If you’d like to offer soft ice cream, you’ll have to rent soft ice cream makers. These aren’t cheap, but if you think you’ll have enough customers, it might be worth a try. Keep in mind that you’ll risk not make enough money to justify your event. On the other hand, your event might be successful enough to repeat. Just remember that the more money you put into the event, the greater the chance that you won’t raise the money you’re looking for.
Don’t be afraid to ask for donations, especially if you’re hosting your own event. Many companies and stores are more than willing to donate for prizes. You might even be able to talk your suppliers into providing most or all of their product for free. It never hurts to ask, and you might save yourself a lot of money.
The bottom line of any fundraiser is always money. Look for donations, recruit volunteers, and even ask for free advertising from local vendors and newspapers. The less money you spend, the more you’ll have for your organization’s funds. With that in mind, don’t be too cheap. Offer a quality event and you’ll be sure to make the money you need.
Too often, traditional winter coats are so insulated that they can make you look like an abominable snowman, or worse, an oversized marshmallow. There is a fashionable alternative. Pea coats are versatile, warm, and come in many different styles and colors. However, there are some things that you should consider before purchasing a pea coat this season.
Pea coats come in many different fabrics. Most of the time, you’ll find them in wool, but they also come in cashmere, polyester, or cotton, as well as corduroy and flannel. Your fabric selection will be based upon two things: how heavy you want your coat to be and how the fabrics feel against your skin. Some pea coats are lined, so don’t simply run your hand over the outer fabric. Try on each available coat before you make your final selection.
There are many colors available on the market today. You can purchase a pea coat in the more traditional and neutral colors of beige, white, black, grey, or brown. However, you can choose to use color to express yourself, investing in a blue, red, or purple pea coat. Find a color that you are comfortable with before making your purchase so you won’t be tempted to exchange the coat later.
Pea coats are available in many different styles, some traditional, and some decidedly not so. Though the classic single-breasted coat has been a favorite for many years, don’t be afraid to search out styles with a little more flair. Pea coats now sometimes come with hoods for warmth. You can find trendier styles with pleated hems and funnel necks. Other options may include: oversized buttons, cargo pockets, interesting belts, and toggles and accents in different styles. Look at everything before you make a decision.
Traditionally, pea coats are about hip-length. However, these days you can get pea coats that are both shorter and longer than the average. Which you choose depends on your own body type and on your local climate. If you have larger hips, you might want a pea coat that only comes to your waist. Those who are particularly curvy will want a coat with a stylish belt to define the waist. And a longer coat that covers more will be ideal for colder climates.
Ultimately, you’ll want to pick a style, color, and fabric that flatters your own figure and appeals to your sense of style, so try on everything before you buy. Be selective, consider all your options, and don’t settle for something you don’t want, and you’ll find the perfect pea coat for you in no time.
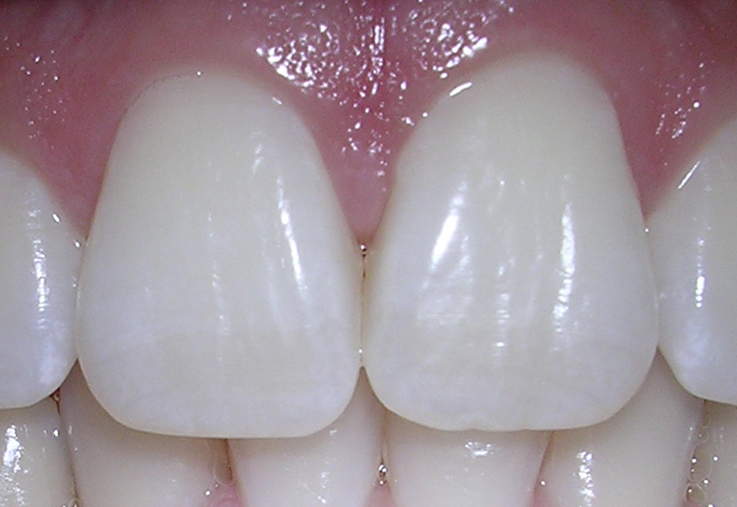
So many people, especially mothers, want whiter teeth and a brighter smile. But teeth whitening at the dentist’s office can be expensive, and the whitening solution purchased at the local drug store isn’t always much cheaper. You can, as an alternative, make your own teeth whitening solution, one that is both effective and inexpensive.
Hydrogen peroxide is the best product to use when creating a whitening solution at home. It is a weak acid and acts like bleach for teeth. Hydrogen peroxide is commercially available in concentrations from 3% to 10%. The 3% solution is the best choice for a homemade tooth whitening solution. Sometimes, hydrogen peroxide can cause a burning sensation or other discomfort. This is usually eliminated once the solution is rinsed away. If the discomfort persists, discontinue use immediately.
Before beginning, collect all your ingredients. You don’t want to be running around searching for ingredients while you’re trying to whiten your teeth. Purchase a box of baking soda, a bottle of hydrogen peroxide, a tube of toothpaste, and a little table salt.
Carefully place approximately two (2) tablespoons of baking soda in a small bowl. Add a small amount of hydrogen peroxide and mix. Continue to add hydrogen peroxide until you are able to make a fine paste. This paste should be thick enough that it clings to your teeth. If it’s too thin, it will just slide off your teeth before any whitening occurs.
Salt can be added, though this is optional. Salt acts as a mild exfoliate, as it is abrasive enough to remove some stains from the surface of the teeth. At this point, you’ll have a mixture that doesn’t taste very good. To improve the taste, try adding some of your favorite toothpaste, though this is optional.
Apply the paste to your teeth liberally using a toothbrush. For maximum effectiveness, don’t lick your teeth or otherwise cause the paste to wash away. Leave this paste on your teeth for approximately five minutes. Do not swallow this paste, as it is made with hydrogen peroxide.
Remove this paste with your toothbrush. If you want to increase the whitening effect of your homemade whitening solution, take a small capful of hydrogen peroxide, no more than 3% concentration, and gargle with it for several minutes. Make sure you spit it out afterwards. Never swallow hydrogen peroxide.
The whitening process is not immediate. You will need to repeat this process, usually once a day, for up to two weeks to see obvious progress. It is safe to use your homemade whitening solution up to twice a day.
Whitening your teeth at home is a simple and uncomplicated process. The solution is easy to use and non-toxic, provided it is not swallowed. It is an effective and inexpensive alternative to commercially available teeth whitening products.
College is all about routine. You go to classes. You study. You hang out with friends. You exercise. It all becomes a part of your daily regimen. Then you go home for any one of the number of college breaks, and your routine becomes a thing of the past. You don’t have classes. Your friends are all on their break. And you quit exercising altogether.
How, then, can any student maintain their workout routine when returning home for break? It’s not easy. At school, you probably have a gym, perhaps a pool, and almost certainly your college comes equipped with a track. Your parents’ house probably doesn’t have those things. And even if you have a full-access gym in your basement, with the absence of all other routine, it can be difficult to find the motivation to exercise.
You’ll need to plan ahead if you want to maintain a workout routine. Evaluate the resources you have at and near your home. Is there a gym you can use while on break? If so, you’re in luck. Get a membership for the time you’ll be home, and use it regularly. As regularly as you used the gym at school. Make an effort to maintain routine, and plan your workout for roughly the same time each day.
If there are no gyms in your area, you’ll have to get a little more creative, but you’ll still need to create and establish a routine. If you jog while at school, jog at home. This can be done anywhere, even if there isn’t a track nearby. Jog around your neighborhood, jog at home, or even go to your local community center or mall. Find a jogging buddy if you have trouble keeping yourself motivated. Perhaps an old friend, or even a sibling wouldn’t mind jogging with you.
Lifting weights is probably one of the easiest activities to maintain while at home. Even if you don’t have a gym nearby, you can still lift weights. There are many portable weights on the market today that you can purchase for very little money, or you can use things around the house. Offer to help you parents with any heavy lifting, or turn your younger siblings into weights that tend to squeal when you lift them.
Exercise bikes are fairly cheap, so it should be easy enough to purchase one to stash in your parents’ garage or shed. Then you’ll always be able to bike when you’re home. Or, invest in a good bicycle and go for a real ride around your old neighborhood. You’ll get fresh air and exercise at the same time.
Many activities can be done without any special equipment. Sit up, push ups, lunges, and others are all easy to perform and require nothing more than your own body. If you want to build up your strength, you can give younger siblings (if you have them) piggy back rides, or just kick a ball around in the yard. Any physical activity is better than none.
Maintaining an exercise routine while on break can be trying. Make physical activity a true routine and do it every day, no exceptions. Make use of the resources at your disposal and get a little creative, and you’ll return to college with your workout regimen intact.