Black boots are generally considered a wardrobe staple in every woman’s closet. They are versatile, classic and fun. With so many styles to choose from, and the option of dressing them up or dressing them down, the black boot is the perfect piece of footwear.
Black high-heel boots of many styles are ideal for a thousand different settings. When paired with a fitted skirt suit, high-heel boots can enhance your look at work; if it’s cool outside, consider adding leggings or tights. For a more casual look, wear jeans and a T-shirt. Fitted jeans are perfect for tucking into your boots, but boot-cut jeans can give a more relaxed feel. It can also be cute to have just the toe of your boot sticking out from beneath your wide pant leg.
This boot style has endless possibilities and, when done right, black high-heel boots can be sexy, sensible, cool, or anything in between.
If you prefer a heeled ankle boot, you’re in the perfect position to be trendy. Pair your boots with skinny jeans, a fun funky T-shirt and you’re ready in a moment for a night on the town. Get a little dressier by exchanging the T-shirt for a fashionable blouse. A blouse and dress slacks combined with a black ankle boot is perfect for most work settings. Black ankle boots can be set off with light-colored trousers, if you desire.
For those who want to make their legs look long and slender, a pair of leggings or tights that match the boots can lend an air of sophistication.
Knee-high black boots are something of a fashion statement and, with the right heel, can truly accentuate the legs. Taller boots look great with wide leg jeans or even a short skirt, if you like to show off your knees. For those women who enjoy the vintage look, knee-high boots fit very well with wrap dresses and jumpers.
The problem with these different boot styles is that they all have heels. For the woman who can’t walk in heels, is too tall for heels, or simply prefers flatter footwear, flat black boots are available at many retailers. These can be of a variety of heights and are extremely comfortable.
The taller boots work well with A-lined skirts; the shorter versions match slim or boot leg jeans almost perfectly. You can also purchase more rugged-looking boots for a down-to-earth look. The possibilities are endless with flat boots.
For the fashion-conscious woman, at least one pair of black boots is a necessity. Choose the style that works best for you, your body type and current wardrobe — and get creative. With a pair of black boots, you can embrace any color that strikes your fancy and dress for any occasion.
Too often, traditional winter coats are so insulated that they can make you look like an abominable snowman, or worse, an oversized marshmallow. There is a fashionable alternative. Pea coats are versatile, warm, and come in many different styles and colors. However, there are some things that you should consider before purchasing a pea coat this season.
Pea coats come in many different fabrics. Most of the time, you’ll find them in wool, but they also come in cashmere, polyester, or cotton, as well as corduroy and flannel. Your fabric selection will be based upon two things: how heavy you want your coat to be and how the fabrics feel against your skin. Some pea coats are lined, so don’t simply run your hand over the outer fabric. Try on each available coat before you make your final selection.
There are many colors available on the market today. You can purchase a pea coat in the more traditional and neutral colors of beige, white, black, grey, or brown. However, you can choose to use color to express yourself, investing in a blue, red, or purple pea coat. Find a color that you are comfortable with before making your purchase so you won’t be tempted to exchange the coat later.
Pea coats are available in many different styles, some traditional, and some decidedly not so. Though the classic single-breasted coat has been a favorite for many years, don’t be afraid to search out styles with a little more flair. Pea coats now sometimes come with hoods for warmth. You can find trendier styles with pleated hems and funnel necks. Other options may include: oversized buttons, cargo pockets, interesting belts, and toggles and accents in different styles. Look at everything before you make a decision.
Traditionally, pea coats are about hip-length. However, these days you can get pea coats that are both shorter and longer than the average. Which you choose depends on your own body type and on your local climate. If you have larger hips, you might want a pea coat that only comes to your waist. Those who are particularly curvy will want a coat with a stylish belt to define the waist. And a longer coat that covers more will be ideal for colder climates.
Ultimately, you’ll want to pick a style, color, and fabric that flatters your own figure and appeals to your sense of style, so try on everything before you buy. Be selective, consider all your options, and don’t settle for something you don’t want, and you’ll find the perfect pea coat for you in no time.
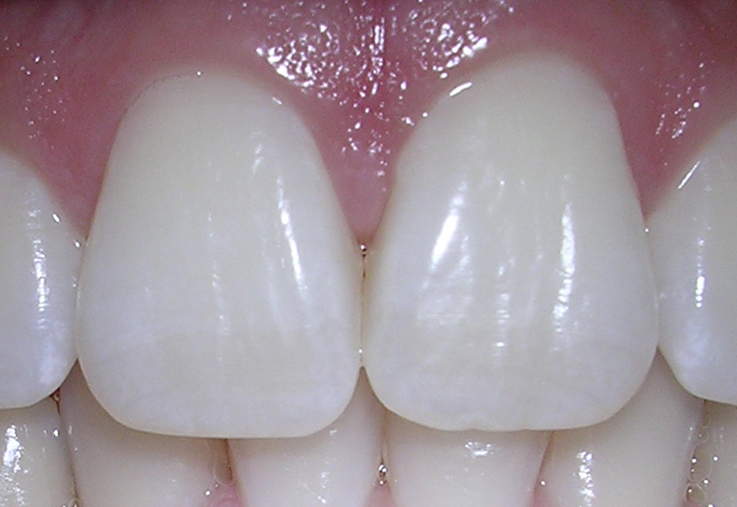
So many people, especially mothers, want whiter teeth and a brighter smile. But teeth whitening at the dentist’s office can be expensive, and the whitening solution purchased at the local drug store isn’t always much cheaper. You can, as an alternative, make your own teeth whitening solution, one that is both effective and inexpensive.
Hydrogen peroxide is the best product to use when creating a whitening solution at home. It is a weak acid and acts like bleach for teeth. Hydrogen peroxide is commercially available in concentrations from 3% to 10%. The 3% solution is the best choice for a homemade tooth whitening solution. Sometimes, hydrogen peroxide can cause a burning sensation or other discomfort. This is usually eliminated once the solution is rinsed away. If the discomfort persists, discontinue use immediately.
Before beginning, collect all your ingredients. You don’t want to be running around searching for ingredients while you’re trying to whiten your teeth. Purchase a box of baking soda, a bottle of hydrogen peroxide, a tube of toothpaste, and a little table salt.
Carefully place approximately two (2) tablespoons of baking soda in a small bowl. Add a small amount of hydrogen peroxide and mix. Continue to add hydrogen peroxide until you are able to make a fine paste. This paste should be thick enough that it clings to your teeth. If it’s too thin, it will just slide off your teeth before any whitening occurs.
Salt can be added, though this is optional. Salt acts as a mild exfoliate, as it is abrasive enough to remove some stains from the surface of the teeth. At this point, you’ll have a mixture that doesn’t taste very good. To improve the taste, try adding some of your favorite toothpaste, though this is optional.
Apply the paste to your teeth liberally using a toothbrush. For maximum effectiveness, don’t lick your teeth or otherwise cause the paste to wash away. Leave this paste on your teeth for approximately five minutes. Do not swallow this paste, as it is made with hydrogen peroxide.
Remove this paste with your toothbrush. If you want to increase the whitening effect of your homemade whitening solution, take a small capful of hydrogen peroxide, no more than 3% concentration, and gargle with it for several minutes. Make sure you spit it out afterwards. Never swallow hydrogen peroxide.
The whitening process is not immediate. You will need to repeat this process, usually once a day, for up to two weeks to see obvious progress. It is safe to use your homemade whitening solution up to twice a day.
Whitening your teeth at home is a simple and uncomplicated process. The solution is easy to use and non-toxic, provided it is not swallowed. It is an effective and inexpensive alternative to commercially available teeth whitening products.
Busy moms don't have a lot of time. Add the sleeplessness and stress that comes with having children and you have a recipe that will truly take its toll on your skin. There's nothing wrong with any mom taking some time to take care of herself, but with limited time, you have to make the most of it. Especially when it comes to skin care and keeping our skin looking youthful.
Because none of us have any time to spare, keep your skin care regimen simple. Choose multi-purpose products so you don't have to spend all morning applying product to your face. Look for things like exfoliants you don't have to rinse off (Dermalogica Daily Resurfacer is a good choice, though there are others) and moisturizers that double as sunblocks (Smashbox Sheer Focus is my favorite). These types of products will save you time and even help save you money.
Being a mom ages your skin. There's no two ways about that. And many of us like the idea of those anti-aging lotions that are out there. But let's face it. We can't turn back the clock and we can't undo the aging process. You can, however, improve the appearance of your skin by moisturizing it. If you want to making your skin look great, you don't necessarily have to invest in those expensive anti-aging creams. Instead, wash and moisturize your face twice a day, exfoliate twice a week, and wear sunblock every time you step outside. Here's where using a moisturizer with sunblock will pay off. Avoid most anti-aging creams.
Why? Take a look at the claims made by these products. Do they actually claim to reverse the aging process anywhere on the packaging? No. They're not allowed to claim something that isn't true, and you simply cannot anti-age anything. Instead, the creams claim to improve the appearance of skin. This can be done with products that will not break the bank, products available at your local drugstore.
Look for products that contain vitamin A (which is sometimes called retinol) and glycolic acids. These two products have been proven to enhance the appearance of your skin, especially when used together. Other good ingredients in your moisturizer include vitamin C and hydroxy acid. Vitamin C helps your sunscreen work better and improves those annoying brown spots. Hydroxy acid, on the other hand, exfoliates the skin and makes your skin appear brighter and more youthful. Still, none of these products are anti-aging, so don't waste your money on a cream that won't do anything more than your average moisturizer.
So what products might you choose that won't cost a lot of money but still get the job done? Well, I've already mentioned two I like, but there are others I've used with great success. Products such as Neutrogena and Reversa are inexpensive but worth their weight in gold. I'm sure you'll have your favorites if you visit your local drugstore and test out a few. I like Clinique Moisture Surge Tinted Moisturizer SPF 15, which handily has enough SPF protection for those long winter days.
And my skin? Well, it glows and is blemish-free. I'm now into my 30s and my skin looks just like it did 10 years ago. And all without those expensive anti-aging creams that don't work anyway.